
In 2024, 5 Essential Strategies for Successful Twitch Livestreaming
5 Essential Strategies for Successful Twitch Livestreaming
Twitch is an extremely popular live video streaming platform, especially among gamers. Unless Twitch streamers enable Video on Demand, the live stream will not be accessible to the viewers later. However, it is quite possible that you cannot watch a live stream completely because you are occupied with other important works, and that is when you can record Twitch stream so that you can watch it later whenever you have time.
Even Twitch streamers may want to record their own live streams so that they can upload them on other video streaming and social media platforms. Apart from enabling VOD on Twitch by the streamers, you can record Twitch with a professional screen recorder. In this article, we have illustrated how to record Twitch streams on Windows PC and Mac easily.
Way 1. Save Video with VOD on Twitch
Way 2. How to Record Twitch Stream on Windows
Way 3. Record Twitch with OBS Studio
Way 4. Record Twitch Stream with XSplit
Way 4. Record Twitch Lice Stream on Mac
Way 1. Save Video with VOD on Twitch
Twitch offers a special feature called Video on Demand(VOD) to all Twitch streamers. If a Twitch streamer enables VOD, his live stream will be saved for the streamer to watch it and upload it on his channel for his viewers to watch any time after the live stream gets over. Streamers can make highlights of the long live stream instantly and upload on social media and video streaming sties like YouTube. Here are the steps to save Twitch live streams by enabling VOD.
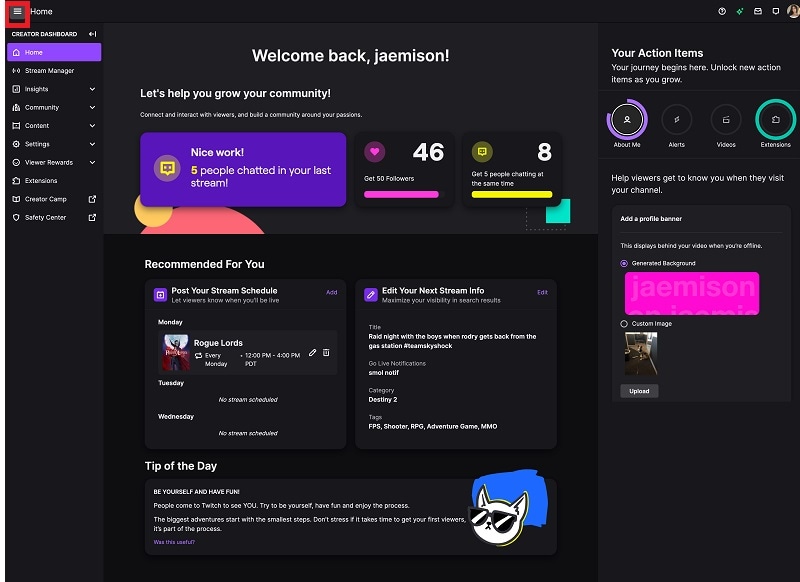
Step 1: Log into your Twitch account and go to Creator Dashboard. Click on the hamburger icon at the top-left corner and go to Settings.
Step 2: Go to Preferences > Channel > Channel Settings page.
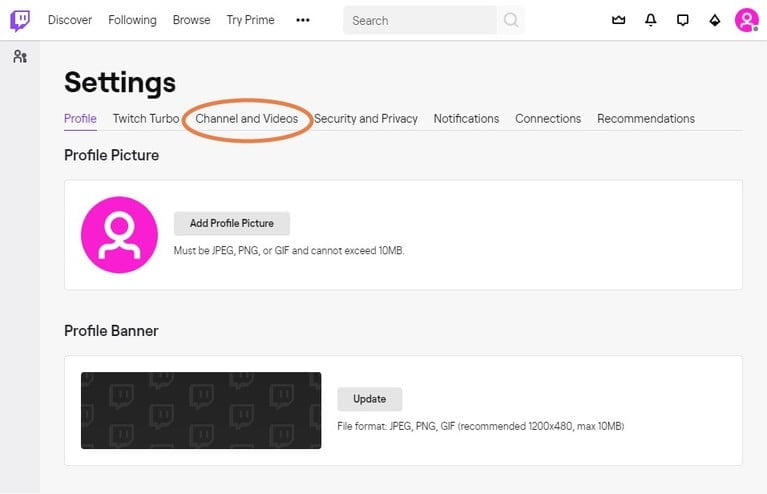
Step 3: Click on your Profile icon located at the top-right corner and from the menu, select Settings.
Step 4: From Settings page, go to Channel and Videos tab.
Step 5: Go to Stream Key & Preferences section and enable Store Past Broadcasts option.

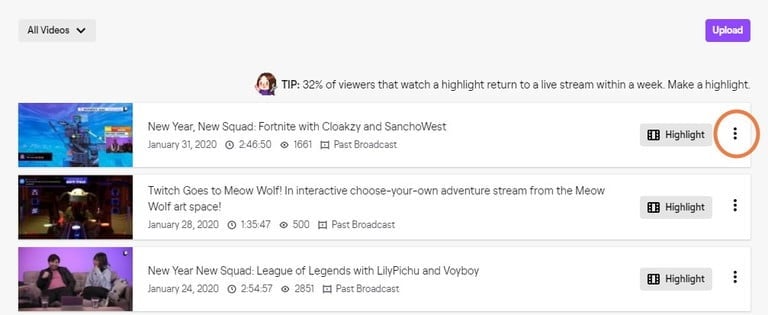
Step 6: Click on the hamburger icon again and go to Content> Video Producer to see the stored videos.
Way 2. How to Record Twitch Stream on Windows
If you are a Twitch streamer and you want to record your own live streams, you need a professional for Twitch live stream record. We recommend Wondershare Filmora - professional video recorder with built-in video editor. This means you can not only record your Twitch stream but also edit your recording to make it more crisp and interesting.
For Twitch streamers, they have to record their screen with webcam in picture-in-picture format. For Twitch viewers, they have to record their screen with system audio. Filmora is available for Windows and Mac. Here are the steps to record Twitch live stream with Filmora.
Step 1: Download and install Wondershare Filmora.
For Win 7 or later (64-bit)
For macOS 10.12 or later
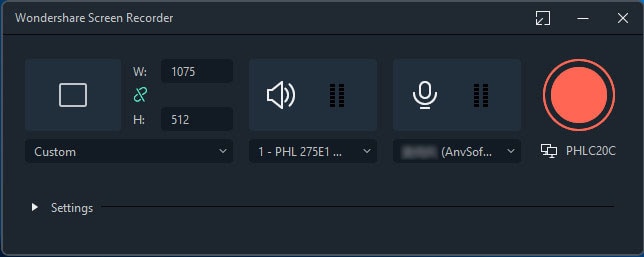
Step 2: Launch Filmora and go for PC Screen option.

Step 3: From Recording window, set the recording screen size and select system audio only if you want to record someone’s Twitch stream. If you want to record your own stream, you have to set the microphone as well as enable Record the Camera Stream option.
Step 4: Click on Record button. You will get a buffer time to switch to Twitch stream to start recording. On the other hand, you can press F9 key to start recording after you start the Twitch stream.
Step 5: If you want to stop recording, click on Stop button or press F9 key again.
Step 6: You will edit the recorded Twitch stream and export to save it on your hard drive.
Way 3. Record Twitch with OBS Studio
OBS Studio is one of the most preferred platforms that are used by Twitch streamers for live streaming. It is a completely free software through which you can go for Twitch streaming records. There is no dearth of features and settings for professional-quality streaming and recording. However, the user interface is slightly complicated and here are the steps you need to follow to record Twitch live stream on OBS Studio.
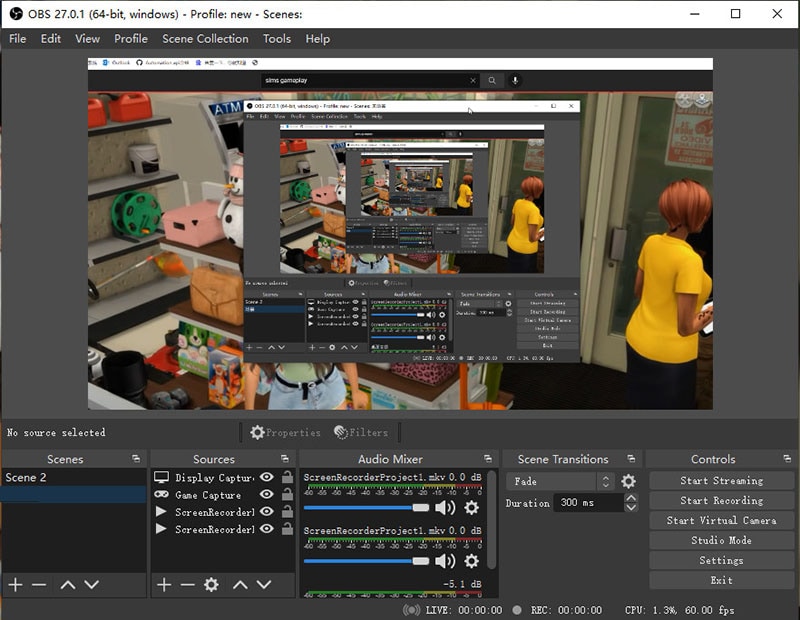
Step 1: Download and install OBS Studio. From Scenes tab, click on “+” button to create a new scene.
Step 2: From Sources tab, click on “+” button and click on Display Capture option.
Step 3: From Controls tab, click on Start Recording option and go to Twitch stream to start recording.
Step 4: To stop recording, click on Stop Recording option under the same Controls tab. You will find the recording under Videos folder on your computer.
Way 4. Record Twitch Stream with XSplit
XSplit Broadcaster is a professional live streaming and recording software. XSplit Suite comes with various tools, but you have to choose Broadcaster to record your screen when you play any Twitch live stream on your browser. You can customize various settings to ensure the video and audio quality is top-notch. Here are the steps for Twitch streaming records with XSplit Broadcaster.
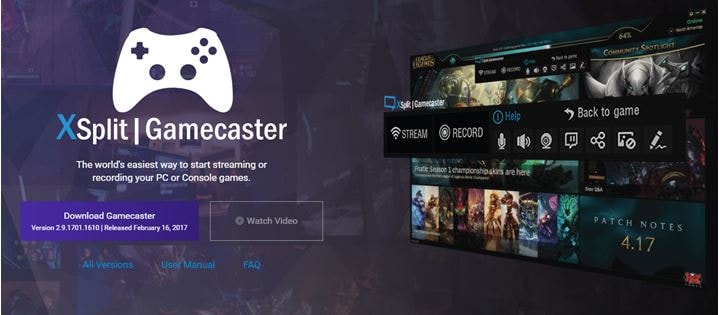
Step 1: Download and install XSplit Broadcaster.
Step 2: Open Broadcaster and go to Add Source> Screen Capture. You can go for Smart capture for customized recording area or Monitor capture for full screen or Window capture.
Step 3: Open Twitch live stream that you want to record and on XSplit Broadcaster, click on Record menu option and select Local Recording.
Step 4: To stop recording, use the same option again. You can find the recordings from Tools> Recordings.
Way 5. How to Record Twitch on Mac
If you are a Mac user, Twitch live stream record gets easy for you. You do not have to install any external software as QuickTime Player comes pre-installed on Mac. In fact, QuickTime Player is the default video player on Mac and it is a great video recorder as well. You can record the screen when you play Twitch stream on your browser. Here are the steps to how to record Twitch streams on Mac.
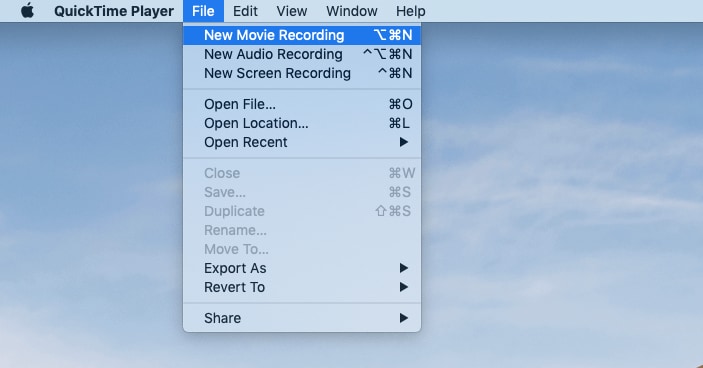
Step 1: Launch QuickTime Player from Applications folder and go to File > New Screen Recording option.
Step 2: Open Twitch live stream that you want to record. Thereafter, start recording by clicking Record button from QuickTime widget.
Step 3: To stop recording, press the Stop button. Thereafter, go to File > Save option to save the recording.
Conclusion
Both Twitch streamer and viewer need to record Twitch stream. A Twitch streamer can enable Video on Demand option to record live streams and upload them on other platforms. For better results, both streamer and viewer can record with Wondershare Filmora. Mac users can use QuickTime Player to record Twitch streams for free. OBS Studio and XSplit are perfect for live streaming as well as record live streams.
Way 2. How to Record Twitch Stream on Windows
Way 3. Record Twitch with OBS Studio
Way 4. Record Twitch Stream with XSplit
Way 4. Record Twitch Lice Stream on Mac
Way 1. Save Video with VOD on Twitch
Twitch offers a special feature called Video on Demand(VOD) to all Twitch streamers. If a Twitch streamer enables VOD, his live stream will be saved for the streamer to watch it and upload it on his channel for his viewers to watch any time after the live stream gets over. Streamers can make highlights of the long live stream instantly and upload on social media and video streaming sties like YouTube. Here are the steps to save Twitch live streams by enabling VOD.
Step 1: Log into your Twitch account and go to Creator Dashboard. Click on the hamburger icon at the top-left corner and go to Settings.
Step 2: Go to Preferences > Channel > Channel Settings page.
Step 3: Click on your Profile icon located at the top-right corner and from the menu, select Settings.
Step 4: From Settings page, go to Channel and Videos tab.
Step 5: Go to Stream Key & Preferences section and enable Store Past Broadcasts option.
Step 6: Click on the hamburger icon again and go to Content> Video Producer to see the stored videos.
Way 2. How to Record Twitch Stream on Windows
If you are a Twitch streamer and you want to record your own live streams, you need a professional for Twitch live stream record. We recommend Wondershare Filmora - professional video recorder with built-in video editor. This means you can not only record your Twitch stream but also edit your recording to make it more crisp and interesting.
For Twitch streamers, they have to record their screen with webcam in picture-in-picture format. For Twitch viewers, they have to record their screen with system audio. Filmora is available for Windows and Mac. Here are the steps to record Twitch live stream with Filmora.
Step 1: Download and install Wondershare Filmora.
For Win 7 or later (64-bit)
For macOS 10.12 or later
Step 2: Launch Filmora and go for PC Screen option.
Step 3: From Recording window, set the recording screen size and select system audio only if you want to record someone’s Twitch stream. If you want to record your own stream, you have to set the microphone as well as enable Record the Camera Stream option.
Step 4: Click on Record button. You will get a buffer time to switch to Twitch stream to start recording. On the other hand, you can press F9 key to start recording after you start the Twitch stream.
Step 5: If you want to stop recording, click on Stop button or press F9 key again.
Step 6: You will edit the recorded Twitch stream and export to save it on your hard drive.
Way 3. Record Twitch with OBS Studio
OBS Studio is one of the most preferred platforms that are used by Twitch streamers for live streaming. It is a completely free software through which you can go for Twitch streaming records. There is no dearth of features and settings for professional-quality streaming and recording. However, the user interface is slightly complicated and here are the steps you need to follow to record Twitch live stream on OBS Studio.
Step 1: Download and install OBS Studio. From Scenes tab, click on “+” button to create a new scene.
Step 2: From Sources tab, click on “+” button and click on Display Capture option.
Step 3: From Controls tab, click on Start Recording option and go to Twitch stream to start recording.
Step 4: To stop recording, click on Stop Recording option under the same Controls tab. You will find the recording under Videos folder on your computer.
Way 4. Record Twitch Stream with XSplit
XSplit Broadcaster is a professional live streaming and recording software. XSplit Suite comes with various tools, but you have to choose Broadcaster to record your screen when you play any Twitch live stream on your browser. You can customize various settings to ensure the video and audio quality is top-notch. Here are the steps for Twitch streaming records with XSplit Broadcaster.
Step 1: Download and install XSplit Broadcaster.
Step 2: Open Broadcaster and go to Add Source> Screen Capture. You can go for Smart capture for customized recording area or Monitor capture for full screen or Window capture.
Step 3: Open Twitch live stream that you want to record and on XSplit Broadcaster, click on Record menu option and select Local Recording.
Step 4: To stop recording, use the same option again. You can find the recordings from Tools> Recordings.
Way 5. How to Record Twitch on Mac
If you are a Mac user, Twitch live stream record gets easy for you. You do not have to install any external software as QuickTime Player comes pre-installed on Mac. In fact, QuickTime Player is the default video player on Mac and it is a great video recorder as well. You can record the screen when you play Twitch stream on your browser. Here are the steps to how to record Twitch streams on Mac.
Step 1: Launch QuickTime Player from Applications folder and go to File > New Screen Recording option.
Step 2: Open Twitch live stream that you want to record. Thereafter, start recording by clicking Record button from QuickTime widget.
Step 3: To stop recording, press the Stop button. Thereafter, go to File > Save option to save the recording.
Conclusion
Both Twitch streamer and viewer need to record Twitch stream. A Twitch streamer can enable Video on Demand option to record live streams and upload them on other platforms. For better results, both streamer and viewer can record with Wondershare Filmora. Mac users can use QuickTime Player to record Twitch streams for free. OBS Studio and XSplit are perfect for live streaming as well as record live streams.
Also read:
- [New] Coordinating Zoom Meetings with iPhone, Android, and Computer Timelines
- [Updated] First Look at Organizing Zoom Session Rooms for 2024
- [Updated] In 2024, Capturing Nintendo Joy in the Best Cards
- [Updated] In 2024, Mastering Video Synchronization with OBS
- [Updated] Smooth Streams From OBS to Insta for 2024
- 9 Quick Fixes to Unfortunately TouchWiz has stopped Of Samsung Galaxy A23 5G | Dr.fone
- Complete Step-by-Step Fix: Solving FIFA 21 PC Crashes - The Ultimate Guide
- Edit and Send Fake Location on Telegram For your Vivo Y77t in 3 Ways | Dr.fone
- In 2024, DirectSnapRecorder Straightforward Windows 11 Capture
- Tech Titans Clash: Xbox Series X Vs. PC Gamers
- Title: In 2024, 5 Essential Strategies for Successful Twitch Livestreaming
- Author: Princess Diana
- Created at : 2025-01-14 16:47:32
- Updated at : 2025-01-15 16:44:22
- Link: https://digital-screen-recording.techidaily.com/in-2024-5-essential-strategies-for-successful-twitch-livestreaming/
- License: This work is licensed under CC BY-NC-SA 4.0.