![[Updated] In 2024, From Console to Screen Efficient Recording Strategies](https://thmb.techidaily.com/e1a2efe9bf1f732226416442fb362e8363cdb8595c634b883b7def7759d3266e.jpg)
"[Updated] In 2024, From Console to Screen Efficient Recording Strategies"
From Console to Screen: Efficient Recording Strategies
To become wildly successful in the web-based gaming local area, you need to have the know-how of how to record console gameplay with a computer. Recording your screen with an outer camera and posting the unedited film online will not get you any supporters, regardless of whether you play your game at an awesome even out or give hilarious analysis. Notwithstanding, so how do you record console gameplay? turning into a talented video maker with the goal that you can execute your gaming recordings appropriately will set aside time, particularly assuming you attempt to sort it out all alone. You want to realize what gear to utilize, how to utilize it, and what changes will make individuals need to watch your recordings.
To know how to record console gameplay, capture cards are turning out to be progressively critical to video game aficionados, and they’re the most ideal way for Xbox players to record interactive film. These gadgets offer remarkable benefits over the Xbox One’s underlying interactivity recording choices and entryways for anybody intrigued by a YouTube or Twitch gaming channel. Fortunately, you can record your screen on any of these control centres. All Xbox One control centres can record interactivity inside, however, anybody hoping to deliver top-notch film will require a catch card eventually. There are huge loads of game recording software available, a considerable lot of which guarantee to be awesome, however, which one is appropriate for you? At the point when you pick game catch software, you want to consider the UI, the sharpness of the video screen, the most extreme cost, and so on. Here’s all you need to know about that.
Part 1. Record Console Games with Capture Card
Part 2. Use a Recorder Software to Capture Console
Part 3. How to Edit Console Game Videos with Filmora
Part 1. Record Console Games with Capture Card
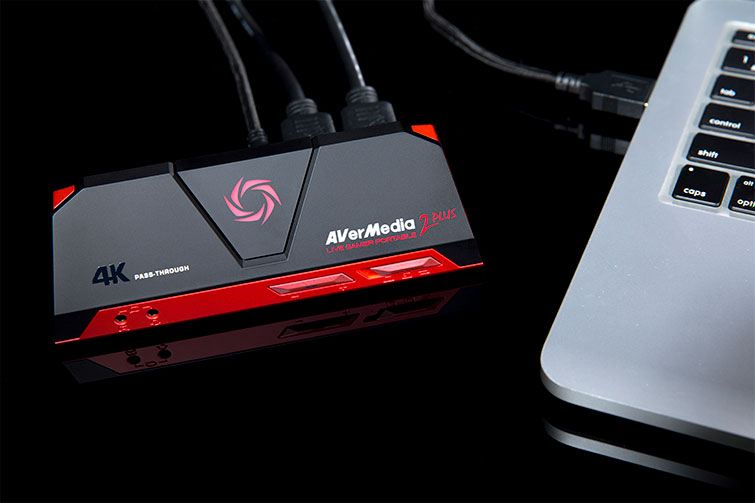
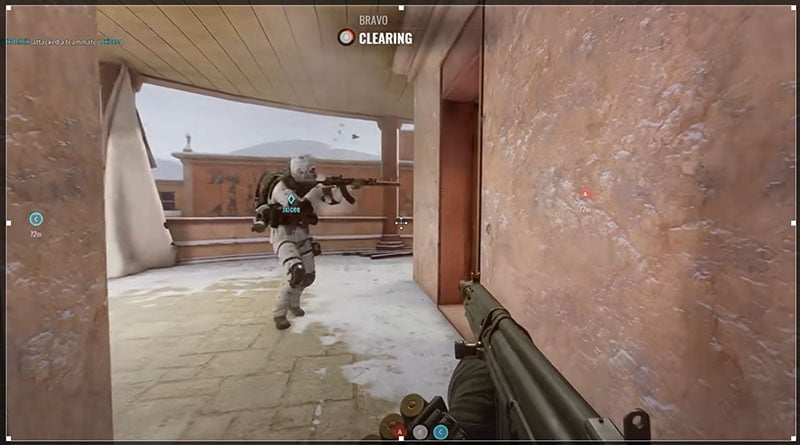
To begin streaming your games on the web or record your interactivity film to make YouTube recordings of your endeavours, you’ll most likely need a catch card. A catch card is a piece of equipment that gets video information and recoveries what it gets. courses it to another area, or both. With regards to the game control centre, the most well-known capture cards will be outer gadgets, so they’ll probably require another HDMI link. The arrangement will normally mean connecting an Xbox to the catch card rather than a TV, then, at that point, running a second HDMI link from the card to the TV. On certain cards, the actual associations end there, yet on numerous others, there will likewise be a USB association from the catch card to a PC.
Step 1: Connect the Capture Card
Assuming you bought an interior card, you’ll need to observe a void PCIe port on your motherboard and attachment the card to it. Once connected, boot up your PC and head to the catch card producers’ site to download the most recent drivers. The equivalent goes for outer cards, which ought to forever be connected to a USB 3.0 port if conceivable so they can move information quicker. While many capture cards accompany a circle you can use to introduce the drivers inside the container, we suggest downloading the most recent drivers from the producer’s site.
Step 2. Launch Console Gameplay
With your drivers downloaded and introduced, open your catch card program on your PC. For instance, all Elgato capture cards utilize Game Capture HD. Presently, you will need to discover where you can design your catch card’s settings, and begin interfacing everything together. Most capture cards accompany two HDMI ports: info and result. Your control centre’s HDMI link ought to be connected to the info HDMI port and your showcase ought to be connected to the capture cards yield HDMI port. Match your catch card’s design settings to the sign your control centre is yielding, and you should see it spring up on the catch card program.
Step 3. Perform Gameplay Recording
Whenever you have a consistent sign, do a test recording, and ensure everything works; then, at that point, you can head into your real-time software and add the video catch gadget to your transfer as a source. At times extra design is needed in your streaming software, however, that is dependent upon the situation.
Part 2. Use a Recorder Software to Capture Console
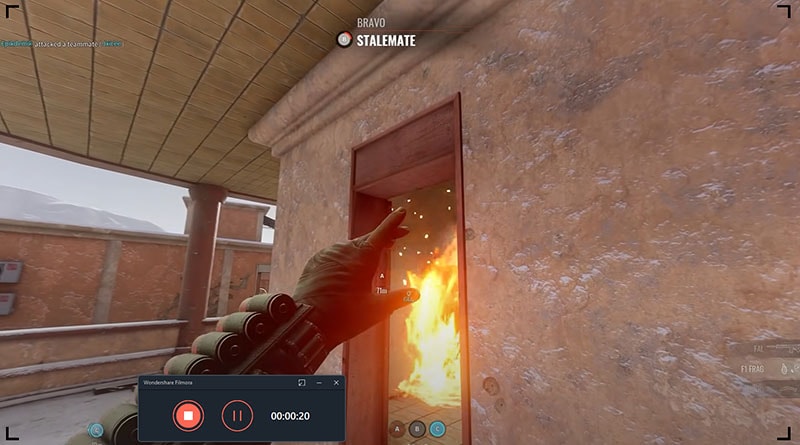
Would you like to record ongoing interaction for we should play, live stream, or instructional exercise? No old screen recorder will do. To make famous and very much respected interactivity recordings, then, at that point, you want to utilize how to record console gameplay with a computer that is upgraded for interactivity. Filmora screen recorder is one of the most known software as far as screen recording. While situated as a screen recorder for computer , the product with its extraordinary capacity of recording at high bitrates and casings, bends over as an incredible recording software for games also. You can record recordings at adaptable casing rates and 4K Ultra HD goals.
For Win 7 or later (64-bit)
For macOS 10.12 or later
Step 1: Install Filmora Gameplay Recorder
Visit the official website and download the latest version of Filmora from there. As soon as the download has been completed, launch it right away. In the starting window, hit the New Project catch and you will see the underlying window interface of this product. From that interface, click on the record button and select the Record PC Screen alternative as follow:
Step 2: Customize the Console Gameplay Screen
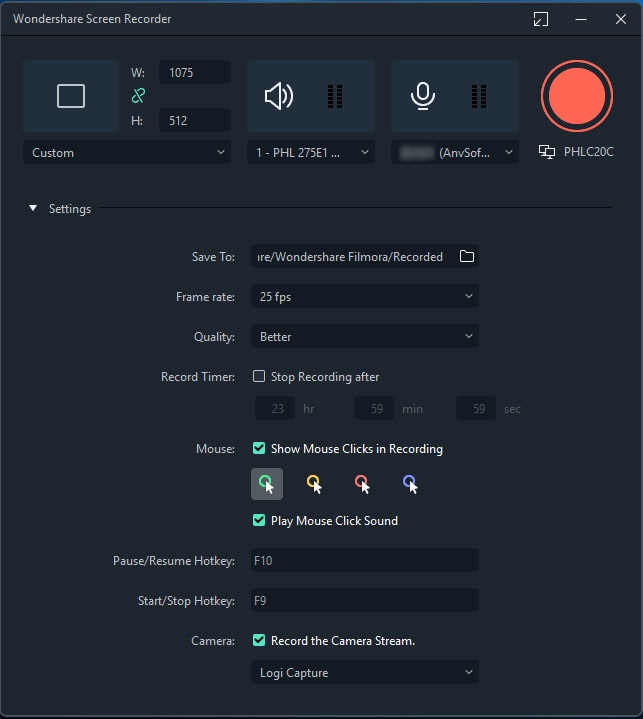
In the account screen window, hit the Settings button at the correct side of the screen and you will see the extended choices for the chronicle screen menu. Here you have a lot of alternatives for your recording setting which are easy to opt for, so you can have a superior comprehension of each choice as follow:
Step 3: Start and Stop Console Recording
In the final step, when your console gameplay is ready, hit the Record button and let the game begin! You will begin the chronicle by keeping the basic general guideline. Then, as you’re finished with the recording, Hit the red dabbed square-shaped button which at last stops the recording account soon after a few seconds as follow:
Part 3. How to Edit Game Videos with Filmora Editor
Which gadget you use will rely upon which game you need to play. To play online PC games, for example, you’ll need a gaming PC. Games like Fortnight, Minecraft, and Breath of the Wild, nonetheless, will require the particular control centre they’re made for, regardless of whether that is a PlayStation, Xbox, or Nintendo Switch. The perplexing video editors also suggest that video archives and pictures don’t have to follow a straight (direct) progression, they can appear in changed circumstances in the scene at the same time with various articles, and whenever. For that, we’re presenting to you the least complex and convenient tool compartment to determine your video content creation with best practices. Filmora is your best approach!
Just you know for the video editors out there, some of them are free, some are business, some are workspace applications, others are on the web. It will in general be difficult to determine what to look for when you are endeavouring to track down a screen recorder application. How do you need to pick which screen recorder to use? Is this something you will use once and a while later delete, or is this something going to transform into a crucial piece of your work interaction? After you’re done with recording console gameplay without a capture card, A good choice, afterwards, is Filmora, which will allow you to create from an expert who screens records each occasionally to a specialist who makes screen-recorded classes or online courses reliably.
Step 1: Import your Files to Filmora
Filmora supports a variety of files to add to your video editing account. Let it be photos, videos, GIFs or the PPTs, you can give it an add up to the software. All you need to do is open the software tool so you can advance without any hassle. To do that, head towards the Video Editor button in the start-up window and it shall open the editor panel as follows:
Step 2.: Add Text Animations
To make your video content stand out from the ordinary, you can add titles to your videos. To add the titles to your videos in Wondershare Filmora video editor, hit the Titles button at the vertical bar of the software interface. Here you can introduce text animations on the go. Simply head towards the Titles menu and choose your favourite text animation preset without any hassle.
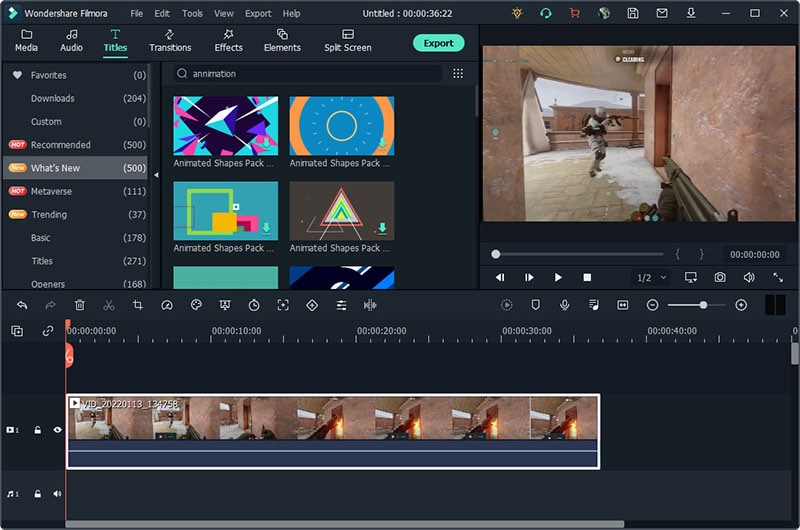
For annotation purposes, you have various built-in figures and objects for your recorded video content in the Wondershare Filmora video editor. To access these useful objects, head towards the Annotations menu as follows:
Step 3: Add Clip Motion and Cursor Effects
You can also utilize the Preview window of the software to overview your selected animation and then add it to the timeline with simple drag and drop. Wondershare Filmora has a big plus of mouse effects which intelligently detects the mouse activity and applies the selected effect on your content. You can access this feature from the Cursor menu of this software interface.
Step 4: Add Variety of Stickers and Effects
Sometimes, stickers in your videos make it unique and eye-catchy which users enjoy and get a better understanding of the videos. In this regard, Wondershare Filmora has its Stickers menu available in the menu bar as follow:
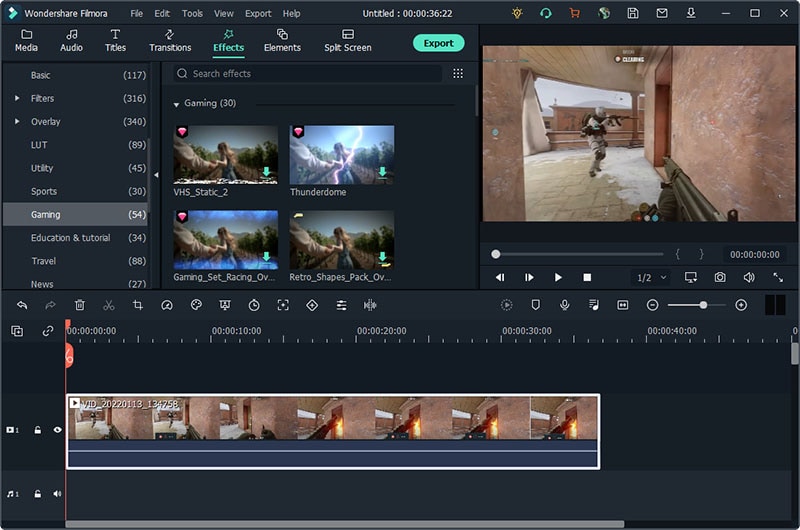
You can add as many effects to your videos which can lead to a stunning video output your audience must enjoy watching. To go into the effects library, go straight towards the Effects menu of the software.
Step 5: Export the Video with Desired Format
Filmora has a basic UI, requiring just a single tick to record, without complex arrangement or an extended expectation to learn and adapt. In the wake of finishing the video recording creation and altering, you are currently prepared to transfer your video. Your document will be transferred as a video record with a wide scope of arrangements, like MP4, AVI, MOV, WMV, MKV, TS, WEBM, M4A formats.
Click on the Export choice on the top right corner of the screen. Select the necessary configuration of the video starting from the drop menu. to go with the issue free product to your ideal area inside your PC, pick the FastExport highlight accessible to you inside the Media library of software interface as follows.
Conclusion
The most well-known games are the ones that permit numerous players to join and have a workaround together utilizing voice talks to continue and dominate the game. Furthermore, the way that individuals are in a real sense making millions simply by playing and recording these games from their screens is strange. With regards to screen recording software, Filmora Screen Recorder is your smartest choice. This device takes the excellence of straightforwardness to the craftsmanship level and it does as such without thinking twice about elements or similarities.
Part 2. Use a Recorder Software to Capture Console
Part 3. How to Edit Console Game Videos with Filmora
Part 1. Record Console Games with Capture Card
To begin streaming your games on the web or record your interactivity film to make YouTube recordings of your endeavours, you’ll most likely need a catch card. A catch card is a piece of equipment that gets video information and recoveries what it gets. courses it to another area, or both. With regards to the game control centre, the most well-known capture cards will be outer gadgets, so they’ll probably require another HDMI link. The arrangement will normally mean connecting an Xbox to the catch card rather than a TV, then, at that point, running a second HDMI link from the card to the TV. On certain cards, the actual associations end there, yet on numerous others, there will likewise be a USB association from the catch card to a PC.
Step 1: Connect the Capture Card
Assuming you bought an interior card, you’ll need to observe a void PCIe port on your motherboard and attachment the card to it. Once connected, boot up your PC and head to the catch card producers’ site to download the most recent drivers. The equivalent goes for outer cards, which ought to forever be connected to a USB 3.0 port if conceivable so they can move information quicker. While many capture cards accompany a circle you can use to introduce the drivers inside the container, we suggest downloading the most recent drivers from the producer’s site.
Step 2. Launch Console Gameplay
With your drivers downloaded and introduced, open your catch card program on your PC. For instance, all Elgato capture cards utilize Game Capture HD. Presently, you will need to discover where you can design your catch card’s settings, and begin interfacing everything together. Most capture cards accompany two HDMI ports: info and result. Your control centre’s HDMI link ought to be connected to the info HDMI port and your showcase ought to be connected to the capture cards yield HDMI port. Match your catch card’s design settings to the sign your control centre is yielding, and you should see it spring up on the catch card program.
Step 3. Perform Gameplay Recording
Whenever you have a consistent sign, do a test recording, and ensure everything works; then, at that point, you can head into your real-time software and add the video catch gadget to your transfer as a source. At times extra design is needed in your streaming software, however, that is dependent upon the situation.
Part 2. Use a Recorder Software to Capture Console
Would you like to record ongoing interaction for we should play, live stream, or instructional exercise? No old screen recorder will do. To make famous and very much respected interactivity recordings, then, at that point, you want to utilize how to record console gameplay with a computer that is upgraded for interactivity. Filmora screen recorder is one of the most known software as far as screen recording. While situated as a screen recorder for computer , the product with its extraordinary capacity of recording at high bitrates and casings, bends over as an incredible recording software for games also. You can record recordings at adaptable casing rates and 4K Ultra HD goals.
For Win 7 or later (64-bit)
For macOS 10.12 or later
Step 1: Install Filmora Gameplay Recorder
Visit the official website and download the latest version of Filmora from there. As soon as the download has been completed, launch it right away. In the starting window, hit the New Project catch and you will see the underlying window interface of this product. From that interface, click on the record button and select the Record PC Screen alternative as follow:
Step 2: Customize the Console Gameplay Screen
In the account screen window, hit the Settings button at the correct side of the screen and you will see the extended choices for the chronicle screen menu. Here you have a lot of alternatives for your recording setting which are easy to opt for, so you can have a superior comprehension of each choice as follow:
Step 3: Start and Stop Console Recording
In the final step, when your console gameplay is ready, hit the Record button and let the game begin! You will begin the chronicle by keeping the basic general guideline. Then, as you’re finished with the recording, Hit the red dabbed square-shaped button which at last stops the recording account soon after a few seconds as follow:
Part 3. How to Edit Game Videos with Filmora Editor
Which gadget you use will rely upon which game you need to play. To play online PC games, for example, you’ll need a gaming PC. Games like Fortnight, Minecraft, and Breath of the Wild, nonetheless, will require the particular control centre they’re made for, regardless of whether that is a PlayStation, Xbox, or Nintendo Switch. The perplexing video editors also suggest that video archives and pictures don’t have to follow a straight (direct) progression, they can appear in changed circumstances in the scene at the same time with various articles, and whenever. For that, we’re presenting to you the least complex and convenient tool compartment to determine your video content creation with best practices. Filmora is your best approach!
Just you know for the video editors out there, some of them are free, some are business, some are workspace applications, others are on the web. It will in general be difficult to determine what to look for when you are endeavouring to track down a screen recorder application. How do you need to pick which screen recorder to use? Is this something you will use once and a while later delete, or is this something going to transform into a crucial piece of your work interaction? After you’re done with recording console gameplay without a capture card, A good choice, afterwards, is Filmora, which will allow you to create from an expert who screens records each occasionally to a specialist who makes screen-recorded classes or online courses reliably.
Step 1: Import your Files to Filmora
Filmora supports a variety of files to add to your video editing account. Let it be photos, videos, GIFs or the PPTs, you can give it an add up to the software. All you need to do is open the software tool so you can advance without any hassle. To do that, head towards the Video Editor button in the start-up window and it shall open the editor panel as follows:
Step 2.: Add Text Animations
To make your video content stand out from the ordinary, you can add titles to your videos. To add the titles to your videos in Wondershare Filmora video editor, hit the Titles button at the vertical bar of the software interface. Here you can introduce text animations on the go. Simply head towards the Titles menu and choose your favourite text animation preset without any hassle.
For annotation purposes, you have various built-in figures and objects for your recorded video content in the Wondershare Filmora video editor. To access these useful objects, head towards the Annotations menu as follows:
Step 3: Add Clip Motion and Cursor Effects
You can also utilize the Preview window of the software to overview your selected animation and then add it to the timeline with simple drag and drop. Wondershare Filmora has a big plus of mouse effects which intelligently detects the mouse activity and applies the selected effect on your content. You can access this feature from the Cursor menu of this software interface.
Step 4: Add Variety of Stickers and Effects
Sometimes, stickers in your videos make it unique and eye-catchy which users enjoy and get a better understanding of the videos. In this regard, Wondershare Filmora has its Stickers menu available in the menu bar as follow:
You can add as many effects to your videos which can lead to a stunning video output your audience must enjoy watching. To go into the effects library, go straight towards the Effects menu of the software.
Step 5: Export the Video with Desired Format
Filmora has a basic UI, requiring just a single tick to record, without complex arrangement or an extended expectation to learn and adapt. In the wake of finishing the video recording creation and altering, you are currently prepared to transfer your video. Your document will be transferred as a video record with a wide scope of arrangements, like MP4, AVI, MOV, WMV, MKV, TS, WEBM, M4A formats.
Click on the Export choice on the top right corner of the screen. Select the necessary configuration of the video starting from the drop menu. to go with the issue free product to your ideal area inside your PC, pick the FastExport highlight accessible to you inside the Media library of software interface as follows.
Conclusion
The most well-known games are the ones that permit numerous players to join and have a workaround together utilizing voice talks to continue and dominate the game. Furthermore, the way that individuals are in a real sense making millions simply by playing and recording these games from their screens is strange. With regards to screen recording software, Filmora Screen Recorder is your smartest choice. This device takes the excellence of straightforwardness to the craftsmanship level and it does as such without thinking twice about elements or similarities.
Also read:
- [New] Full PS4 Capture Tutorial Using OBS
- [New] Optimal PPT Presentation Capture Methods
- [Updated] Chuckling Challenge Brainstroming 7 Humorous YouTube Videos for 2024
- [Updated] Enhancing Engagement 10 Must-Have Tools for IG Gurus for 2024
- [Updated] Swift Snap Reinstatement Techniques for 2024
- 2024 Approved MacCam Essentials Tips and Tricks Recording
- Activated Safeguard Alert: Enable All Security Measures Immediately
- Capturing Moons A Guide to Proper Night Photography Techniques
- Hard Reset Oppo Find N3 in 3 Efficient Ways | Dr.fone
- In 2024, Top 7 Phone Number Locators To Track Realme Note 50 Location | Dr.fone
- Master Smooth Gameplay: Fix Stutters, Elevate Frame Rates in Call of Duty's Warzone
- Unveiling Intel's New Gaudi AI Processor: The Next Big Thing in Business-Oriented Computing
- Title: [Updated] In 2024, From Console to Screen Efficient Recording Strategies
- Author: Princess Diana
- Created at : 2025-01-05 20:08:13
- Updated at : 2025-01-09 16:19:50
- Link: https://digital-screen-recording.techidaily.com/updated-in-2024-from-console-to-screen-efficient-recording-strategies/
- License: This work is licensed under CC BY-NC-SA 4.0.